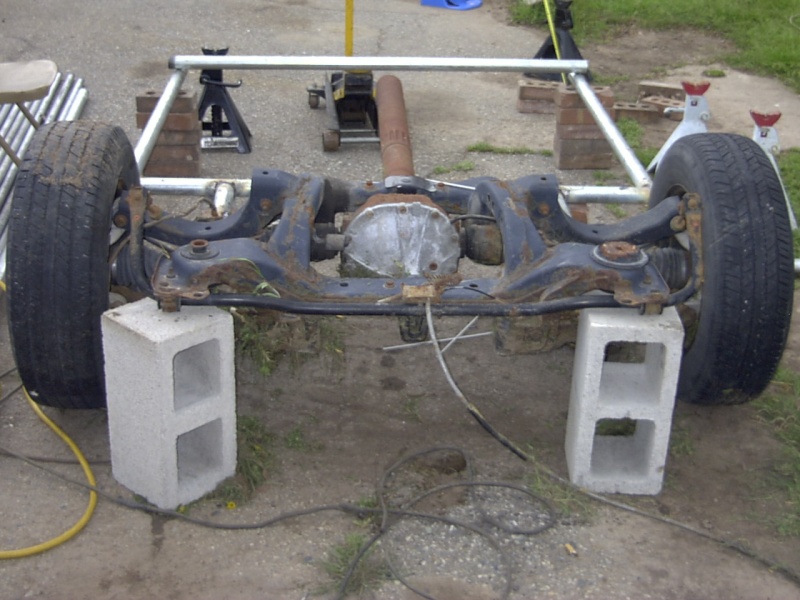
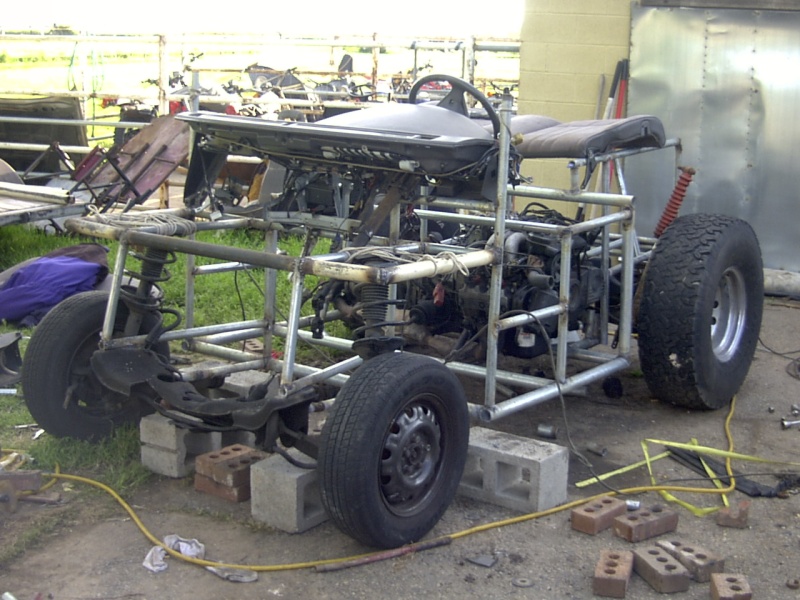
 Basic shape with rear suspension
Robs Stupid Buggy Progress May-June
May 01, 2010 The Rangers have a 76 inch wheelbase and are 60 inches wide by 113 inches long. Should be pretty easy to keep the width but the length and wheelbase may be a bit tough.
I thought a bit about using a solid rear axle, but probably has to have independent rear suspension, just because the rear driveshaft has to be quite short.
I just happened to have an independent rear suspension from a 91 TBird that wasnt being used since I stole its motor to repower the Falcon. Should be a good match, but I am worried about strength of the 7.5 inch differential
Basic shape with rear suspension
The car was geared to go 180mph at redline in overdrive. The rear differential I am using is 3.27:1, so with normal 24 inch subaru tires on the rear, max speed at redline would be about 55mph. Using 33 inch tires would increase the top speed to about 75mph. That seems perfect to me.
I have some 33 inch tires for the buggy, but I dont have any rims that fit the rear axle and the tires yet. My mockup has to use the fairly normal 26 inch tires for now until I find a solution.
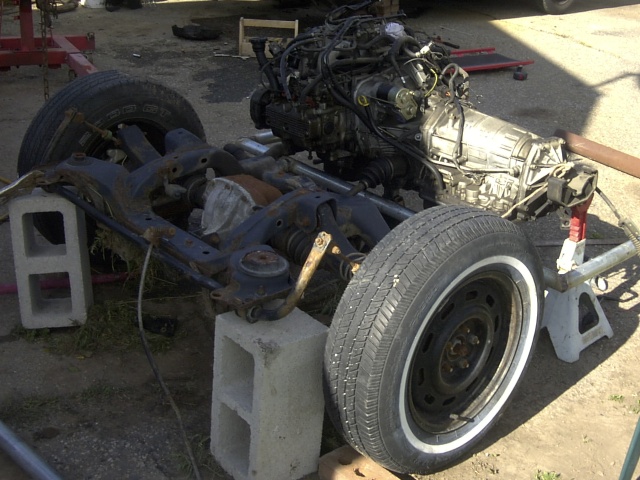 Motor positioned about where it needs to go
The intake manifold on this motor is quite a bit taller than the one in the 86 Subaru I measured. The problem with the older EA82 motor is that it didnt have overdrive, which would severely limit top speed. Im not worried about needing to go 80mph, but when the vehicle is geared to top out at 50 means the motor would have to spin around 4000 rpm to cruise at 30. Thats just not a good idea. The EJ22 motor in the 90 Subaru has much better parts availability, so Ill just have to deal with the height.
Since the rear end assembly has very few symetrical points to measure from, it makes it very difficult to determine the exact distance and angle to connect the rear end assembly to the rest of the frame. The plan is to get the motor mounted in a proper position relative to the frame, then reposition the height and angle of the rear end so the driveshaft comes off the differential as perfectly straight as possible to minimize driveline vibration.
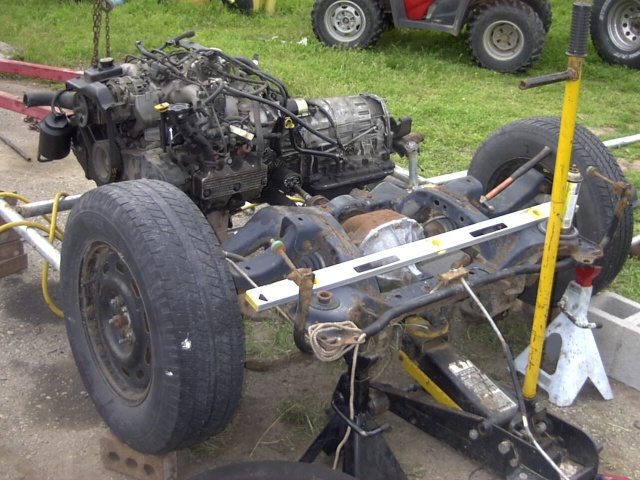
 Got the motor mounted to the frame instead of jackstands!!
May 05, 2010 The buggy is coming along nicely. Now that the motor is mounted, the next task is to make the driveshaft to determine the right angle for the differential. Then I have to cut the rear end assembly loose to reposition it now that I have a reference point now that the motor is mounted. It needed to be a couple inches higher to get the right amount of ground clearance at nominal halfshaft angles.
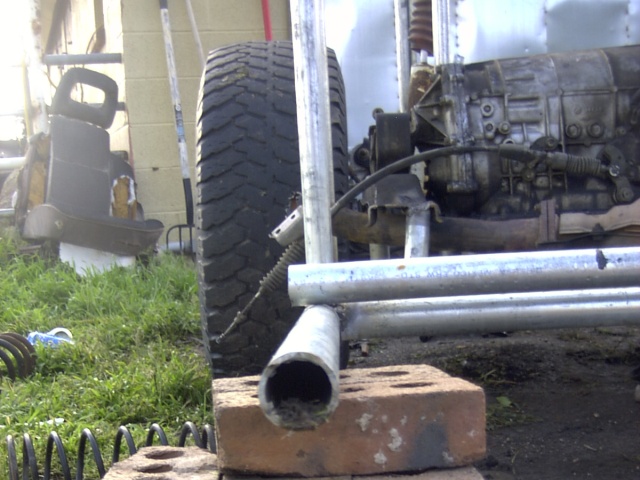
 Rear end assembly moved up and angled back
It took so much tilting of the rear end assembly to get the driveshaft to come off the differential straight that the slip joint in the motor end of the driveshaft is nearly popping out of the socket! Now I gotta make the driveshaft about an inch longer, which will change the driveshaft angle a bit, but hopefully not enough to affect the necessary height.
I had to build rear bumper to get square points to measure from. Some additional connections between the front and rear were needed to solidify the frame to allow checking how large to make rear wheel wells and stuff
 Over a foot of rear wheel travel in the up direction!
Since the tires that are going on the back are 33 inches tall, and the ones currently on the rear end are only 26, I must allow for at least 3 additional inches above the tire for the wheel well. A couple additional inches of clearance is a good idea, in case I decide to add even larger tires later.
A significant portion of the rear frame area has been completed, and connected to front with 4 frame members. Its strong enough to support its own weight, but needs several more reinforcements before it is strong enough to survive driving conditions. Its not entirely obvious how to reinforce the frame yet.
May 11, 2010After trying half a dozen or more springs, I found some that are pretty close to the right rate and height. They are from the front of a 79 Ford Bronco. They came with a front end that I bought to convert my Scout to coil spring front suspension. It sits an inch or 2 lower than I would like. I have some much taller and stiffer springs that I put on my Scout later that lifted it a couple inches, but am going to wait a bit and see if I want to swap them
The main reason I want to wait is that the suspension doesnt seem to have much up travel, but has nearly a foot of droop before the spring separates from the frame, and the ride height can be fixed later with airbags. Will see later how it turns out.
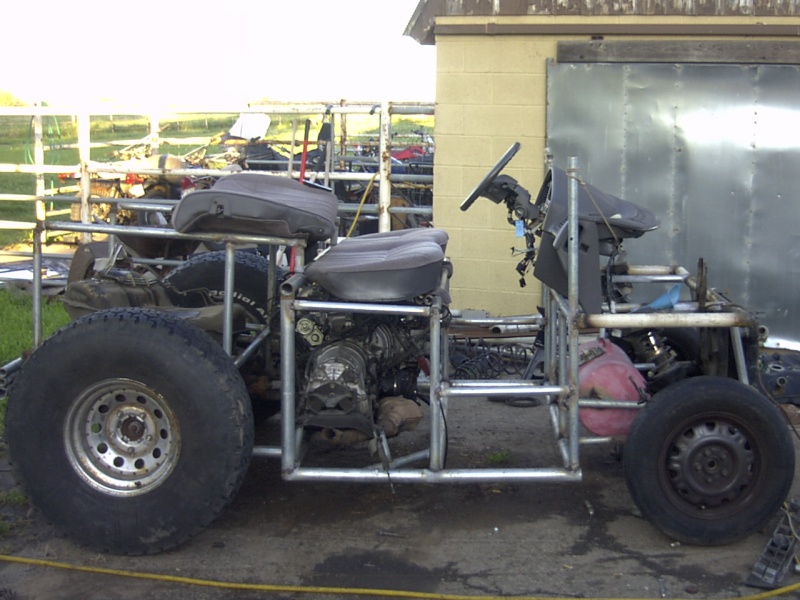
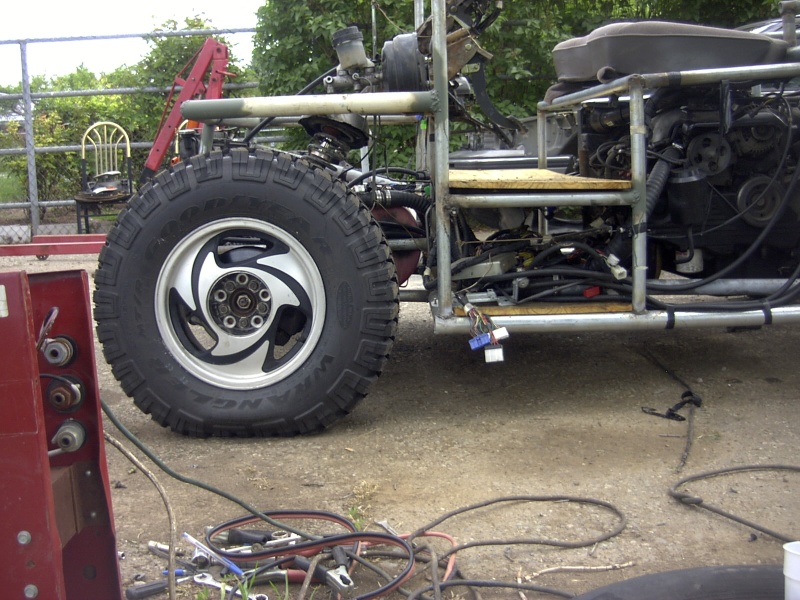
May 11, 2010 Finally got the adapters to allow bolting up the bigger rims and tires. It looks WAY better now with the right tires.
 Tires stick out more than Id like
The rear end is not complete, since it needs better support for the springs, and shock supports, but now that the rear end is supporting its own weight, its time to start working on the front end.
Since the front end wont be supporting a large percentage of the overall weight, the front end doesnt need as much suspension travel, so I plan on using the stock struts from the Subaru. This will make the front end much simpler.
May 15, 2010 Got the front end attached! Just need supports for the struts, and a bunch of strengthening, but the wheelbase has been set at about 79 inches.
May 17, 2010 The 33 inch tires were cool. But 35s would be better, wouldnt they? Looks even better with the larger tires!! Having 35inch tires instead of 33s, increases the top speed to almost 80mph.
 Monster tires for a little buggy!
May 20, 2010 Another whole day of welding and the front suspension is mostly complete. Springs on the Subaru struts are WAY too stiff for the buggy, since there is very little weight on the front of the buggy compared to the original car, the springs compressed an almost imperceptible amount when I set all the weight on the front tires. The correct springs for the weight would compress the springs at least a couple inches.
I need to install springs of the correct stiffness before I know where to mount the tops of the struts to set the ride height, and I will need to decompress the existing springs to remove them before I can try any other springs. Thats why the struts are fastened with ropes for now. I guess Im done for today.
 All 4 tires supporting the buggy!
 Super high-tech strut mounting system
May 22, 2010 After trying several sets of springs for the front, I ended up using springs that I think were from the rear of an 88 Chevy sprint. They seem too stiff too, but are the softest ones I have. When I add more stuff to the front end, like the gas tank, radiator and rest of the frame, it may be about right
I got the struts mounted to the frame, and steering hooked up!! I had the wife pull me around the track with the 4 wheeler. Rear suspension was pretty awesome until the rear springs popped off and shot very high into the air! With no springs, the buggy frame sat down almost almost to the ground. Pretty tough for the 4 wheeler to drag the buggy back to where I can work on it
May 23, 2010 I decided that it was time to mount the rear spring holders to contain the springs better. While I was at it, I reinforced the bed rails that the spring holders attach to be stronger. Then I had my son pull me around the pasture again.
The rear suspension is incredible!! I found that the springs arent too stiff like I had thought. The rear tires tuck right up into the fenderwells like I had hoped, and droop about a foot before end of travel is reached, for a total travel of about 24 inches!!!!
The front suspension has very little clearance, and still seems too stiff, but will get more clearance once I swap out the small front tires, and may not seem as harsh with larger tires, and the stiffness will get a bit better after adding more weight later. I was too excited to take any pics, but its gonna be so awesome!
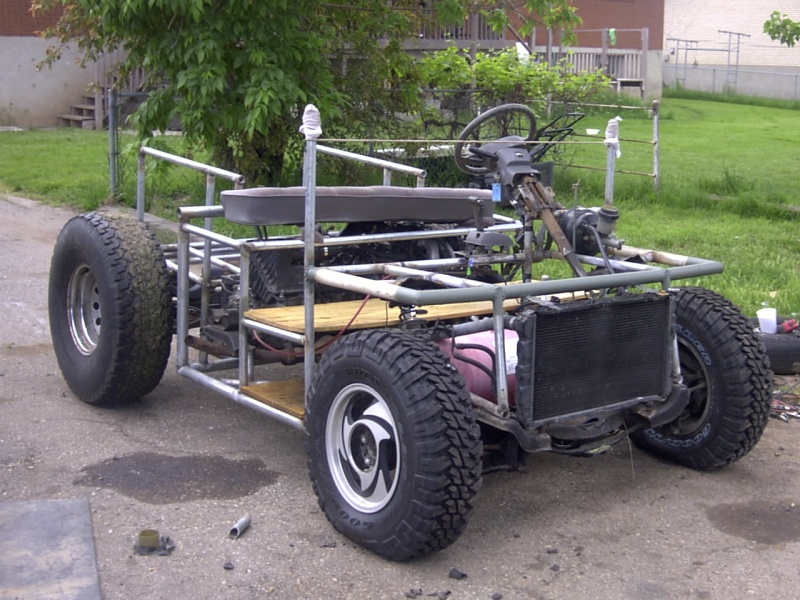
May 24, 2010 I got the seat and radiator mounted, and the gas tank made and mounted
 Starting to look like a real buggy!
May 25, 2010 It didnt seem like the radiator was that far from the motor, but it took $200 of hose to connect the radiator hoses, transmission cooler, and gas tank. I didnt get the part of the wiring harness for the fuel pump, so its just hotwired for now.
Hooking up all the hoses was a pain, and there wasnt a way to make the lower radiator hose completely avoid the drivers side tire well. Its gonna need a guard of some sort to keep mud and rocks from shredding the section of exposed hose. The routing of the hoses over the gas tank is worrying as well, since it will be really crowded after installing the floor. All in all, it took 14 hose clamps to just hook up the radiator hoses.
The fuel and transmission cooler lines were easy since they are quite flexible and take very little space. It only took 8 clamps for the 4 little hoses (1 on each end of the 4 hoses).
After I got all the hoses connected, there was even time to start hooking up the wiring harness! I labelled several of the connections, and the connectors are all keyed to where they wont connect to the wrong one, so besides being dozens of connections, and slightly different locations, it was pretty painless to get it all hooked up.
Since the engine and drivers area is configured quite a bit different than the car was, a couple of the connections were very tight to try and stretch to fit, but I got them all connected! Several of the dash lights came on and the motor cranked with the key. Hotwiring the fuel pump didnt make it run, and further investigation revealed that it wasnt getting any spark, and I noticed that the check engine light wasnt on. Double checking all the connections revealed that the mondo connector that bolts together was loose. Tightening the connector made the check engine light come on and the next time I tried cranking it, it started right up!!!! Vrooooom Vrooooom!
After plugging the brake booster line, it idled quite a bit smoother, but it seems like it is running out of gas. It runs for 10 seconds or so, then stalls, but starts right back up after about 5 seconds or so. I only put a gallon or 2 in the 11 gallon gas tank, just to see how good I got the pickup positioned in the tank. Apparently it needs more fuel than that to run correcly.
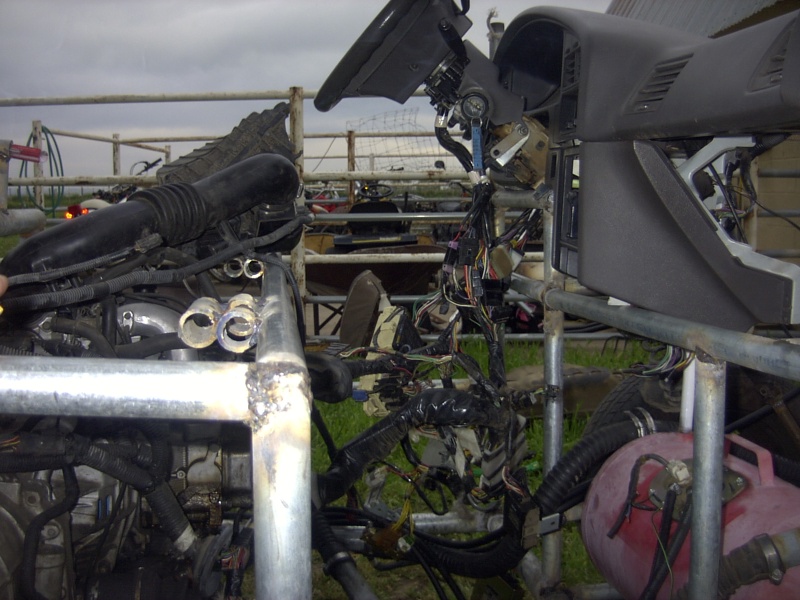 Lots of wires. All in the way, but it runs
May 26, 2010 I finally got new tires for the front. They are way bigger than the squishy stock Subaru tires. They are 30x9.5/15s. Should help smooth out the rough stuff.
The stalling issue was because the idle air motor has a separate hose that I thought was part of the PCV system, and didnt connect. Once I connected up the idle air control hose to the air intake tube, it idles pretty good.
Also got most of the hoses and wires straightened out. I moved the airbox to behind the seat for now, until I can make a custom intake tube. Then, I removed most of the wires that arent needed for basic operation, and stretched the ignition wires so I can hide all the electronics under the floor.
This allowed me to finish the floor supports and install the floor. The wood I used is slightly warped, but will level out after I clamp it down somehow. The trick is that the floor has to be easily removeable to allow for storage under the floor.
Thank goodness the seat still fits. I was worried that turning the intake tube upside down would interfere with the seat.
All I have left is to modify the transmission, and add brakes, throttle, shifter, and find a place for the battery. I so hope to get it done tomorrow so I can take it out camping this weekend!
May 27, 2010 After some research, it is pretty tough to weld the diff in the transmission, so I just welded the idle driveshaft to the frame for now. I only hooked up half the brake master cylinder and plugged the secondary circuit to prevent brake fluid from being lost out of the half not being used. I couldnt find a good cable long and stiff enough to work to extend the throttle, and the shifter was very tough to hook up, but I got it driveable!!
I welded a piece of 1 inch pipe between the floor and subfloor. The first time I welded it, it worked for about 5 feet before ripping a hole in the pipe. I rewelded it with gobs of weld, and reinforced the pipe quite a bit, and it worked good enough to go for a ride!!
I moved the floor board to the subfloor to support the computers and hoses and keep them from dragging on the ground. I had to make a new floor to know exactly where to put the brake pedal.
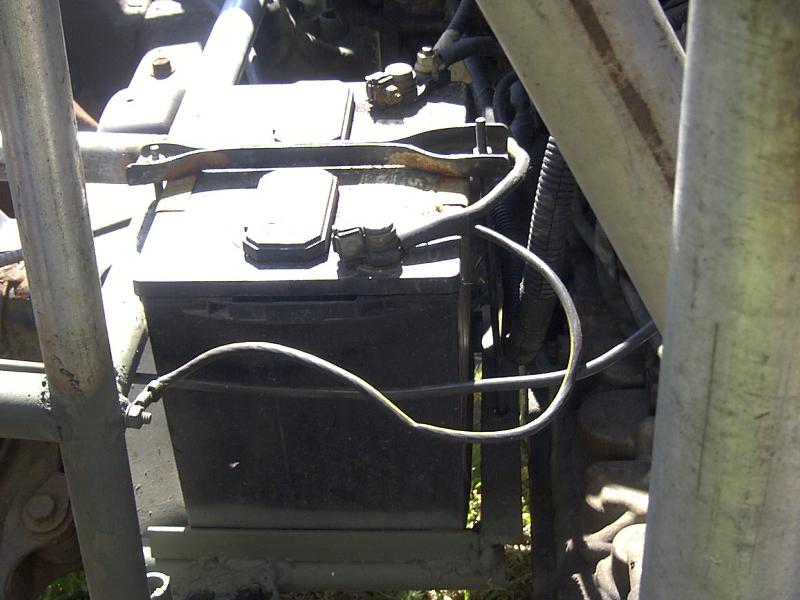 Battery has a parking place now
 Silly wood to support puters and act as a floor
Im not a big fan of brakes, but going down steep hils without brakes would be way too exciting so I figured I had better install brakes. Since Im pressed for time, I didnt want to bother with the rear brakes. In the late 60s, they decided all brake master cylinders should have 2 reservoirs, in case one half failed, only half of the fluid would leak out. The Subaru master cylinder feeds both circuits with a single reservoir, which seems to defeat the purpose of having 2 separate circuits. Since I was only using one cicuit for now, I plugged the input to the reservoir that feeds the side I wasnt using. Much easier than trying to plug the high pressure side. A further complication that the brakes are power assist, and I dont have enough of the right size hose to hook up the booster, the brakes feel really spongy for the first half of the pedal travel, but still work good enough to lock up the front wheels. Good enough for now!!
I have several cables that I could use to extend the throttle, but all the ones with appropriate ends were rusted solid. I spent quite a bit of time with penetrating oil to try and free one of the cables, but finally gave up having a throttle pedal for now, settling on having a cable taped to the frame that I can pull with my left hand to accelerate.
The shifter had quite a bit of options how to extend to an appropriate place. I had a complete, very expensive ratchet shifter that I wasnt using anymore after the transmission in the Scout melted and I replaced the transmission with a manual one. First try was to connect the ratchet shifter directly to the Subaru transmission, but the gear spacings werent right, and wouldnt allow shifting down into 1st.
The second, (or 3rd, or 4th), idea was to just use the new cable to extend the distance between the stock shifter. Various incarnations of this finally ended up with me mounting the shifter sideways next to the steering wheel and making an extension rod to connect between the shifter and the new cable, not even using the Subaru cable.
 Can kinda see the shifter setup
Time for another test drive!!! Everything works great now, except its a little scary to go fast, since can only drive with one hand since the other hand is busy with the throttle.
Well, its the end of the day, and Im stupid tired. Even though it is very driveable, It doesnt get to go camping with us yet. There are too many unfinished things. It needs a foot throttle, the battery is only fastened to the frame with some rope, no rear shocks, needs vacuum supply to brake booster, radiator fan needs to be connected so I can at least turn it on manually, the seat back has nothing to connect to, rear end sits kinda low, no rear fenders, computers have no protection from mud and rocks, transmission differential needs to be welded to double the torque, rear differential needs to be welded to have full 2 wheel drive, and the frame could definitely use some triangles to reinforce it.
Other than that, it is perfect!!
See the 100hp lawnmower I built
See the other carts I have built
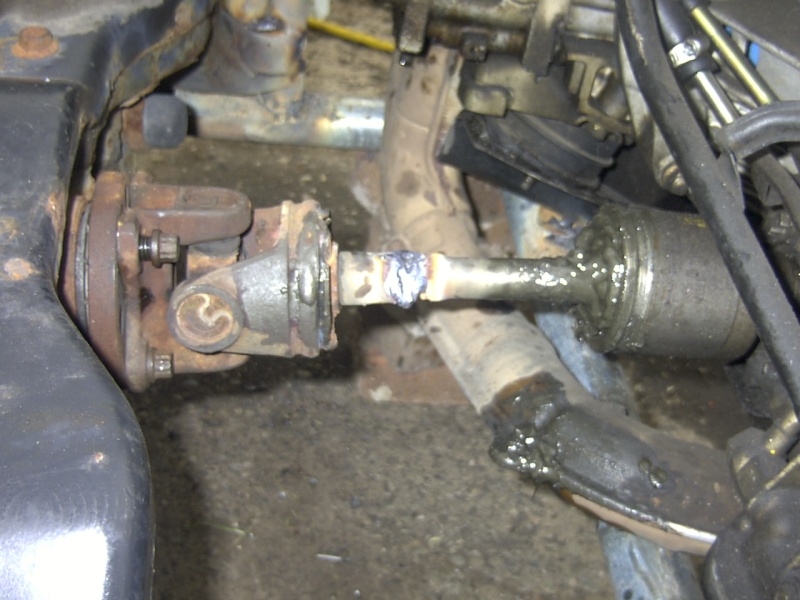 Driveshaft is too short now!
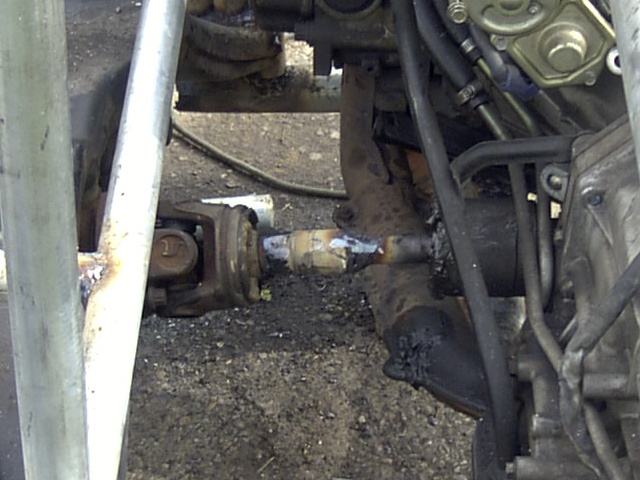 Driveshaft a bit longer now
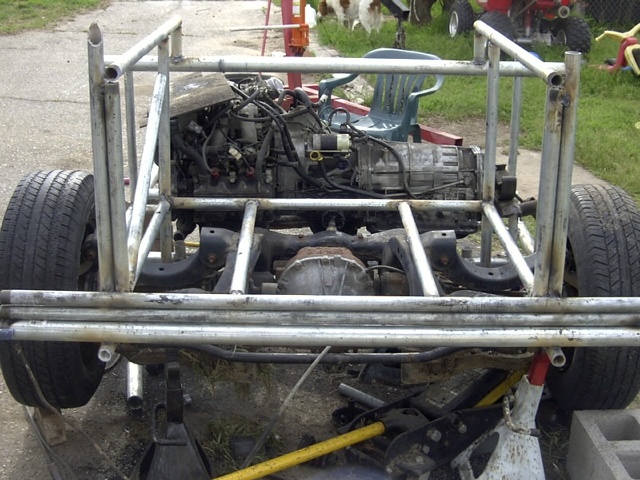 Finished boxing in the bed
 Finished boxing in the bed
 Springs holding up buggy!
 I got big tires!!
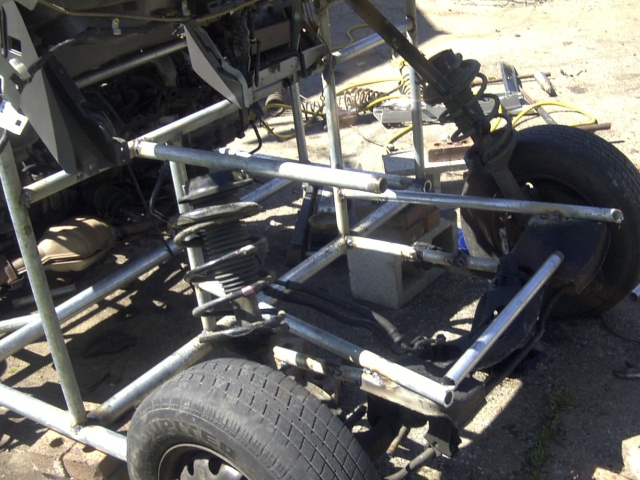 Dash and front end mocked up
 Dash and front end mocked up
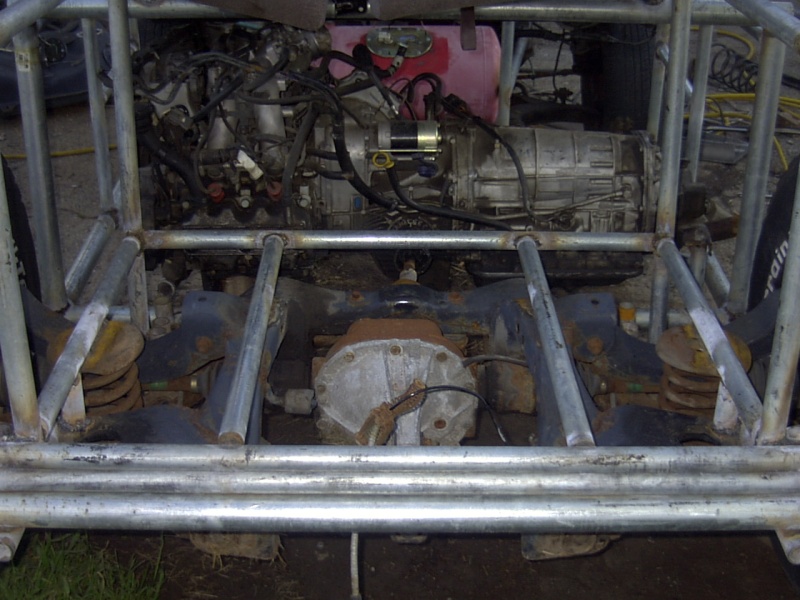 Rear Suspension is complete
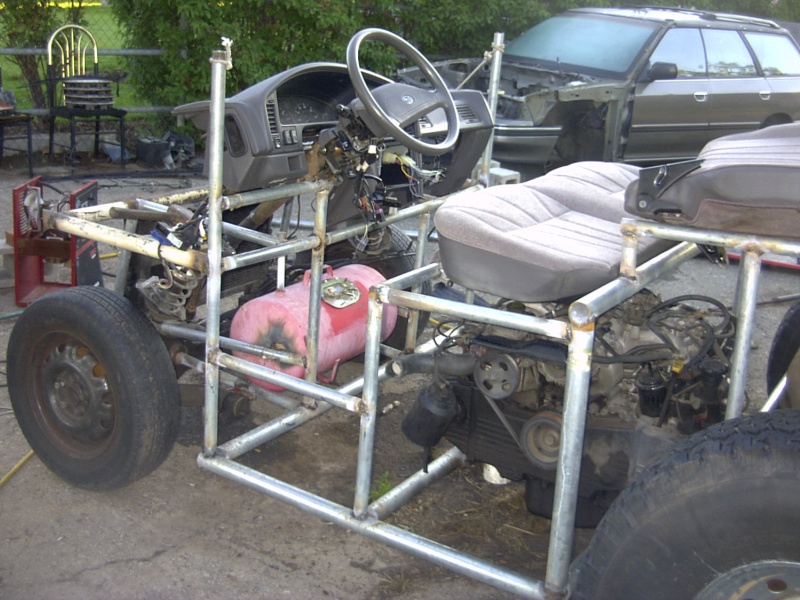 Seat and gas tank mounted
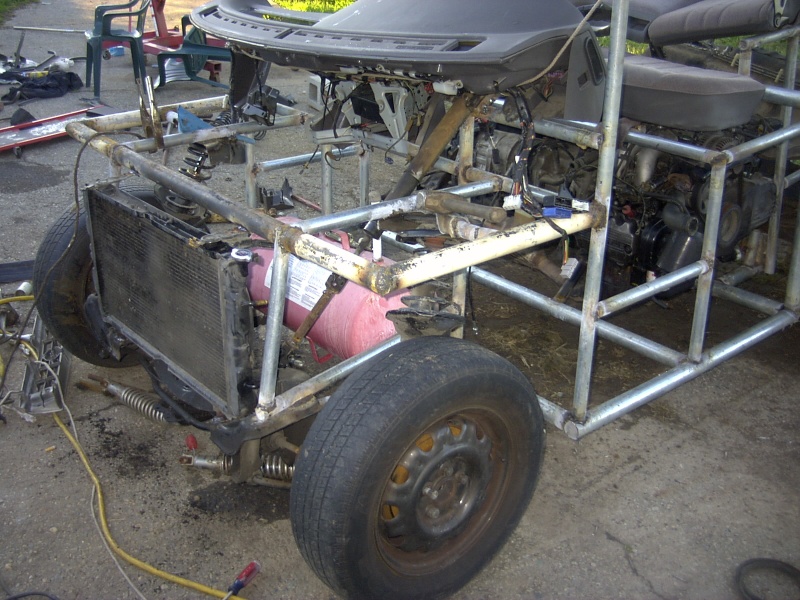 Radiator mounted
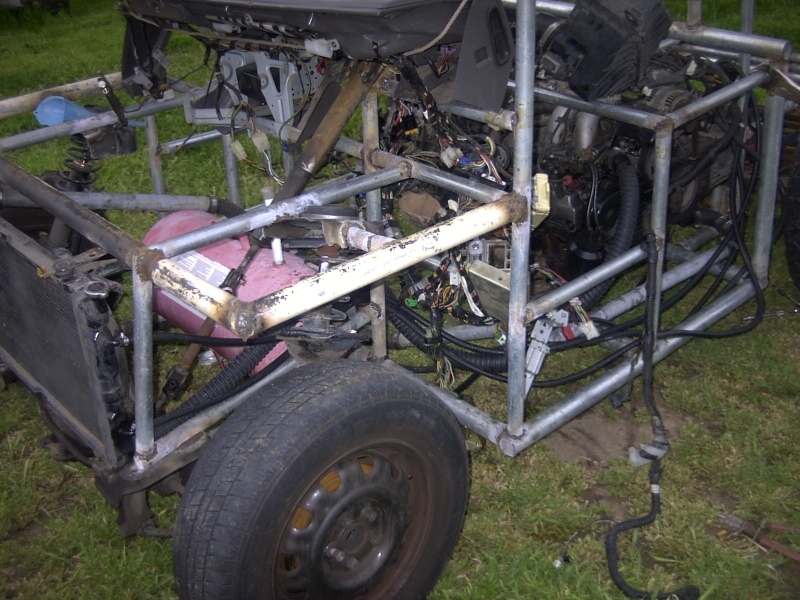 Hoses all connected!
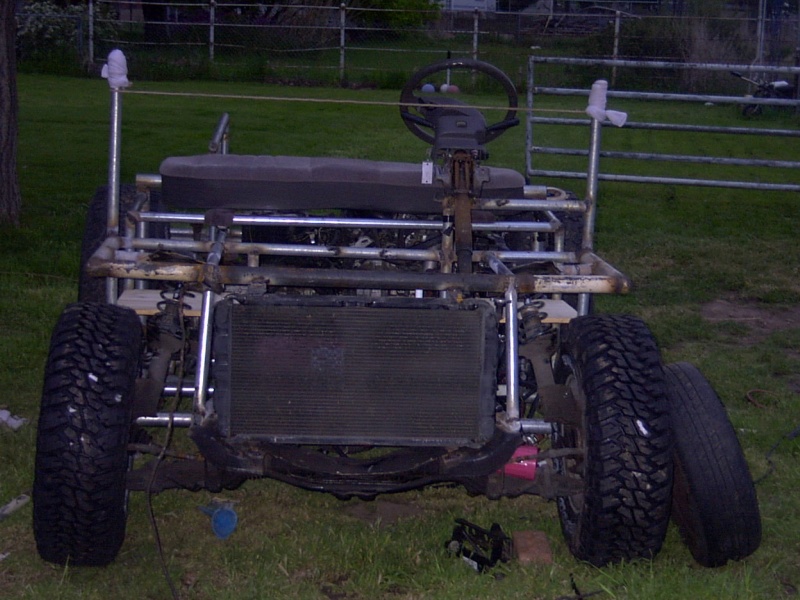 Way bigger than 185/70/14s
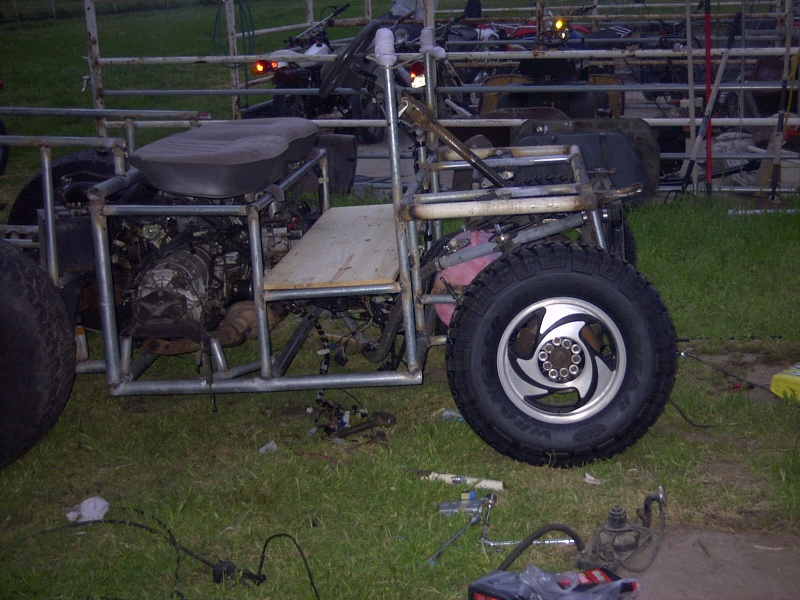 New rims and gnarly tires!
 Seat and floor
Leave a Comment