 Soaked brake parts
Robs Stupid Buggy Progress July
Jul 6, 2010 Well, I finally got to take the buggy out to the mountains last weekend! I drove it about twenty miles, and it did awesome for its first test! Since we forgot to bring extra gas, I was worried enough about running out of gas that we headed back before got to a place harsh enough to test the suspension flexing. There was some fairly sticky mud at the end, but didnt try cause I woosed out.
There was some mostly smooth, fairly steep, rocky, and narrow parts that it made it through really easy. I did get stopped on a particularly narrow downhill part by a root that protruded into the trail. It deformed the side of the rear tire enough to make me worry about puncturing the sidewall, but I backed up a couple inches and cranked the wheel and went on my way.
The front brakes locking up so easy made going down steep hills a little scary, and one of the rear brake cylinders started leaking enough to make the brake fluid level dangerously low. I put some water from the cooler in the master cylinder as a last resort, and made it back safely.
The only other thing that didnt go perfect was the front strut mounts. Apparently repeatedly catching several feet of air at home was nothing compared to driving over dozens of basketball sized rocks at 20-30mph. The sheet metal part of the mounts that hold the tops of the struts and support all the weight in the front bent quite a bit.
One kinda annoying thing I noticed was that the buggy didnt seem to want to downshift when giving it lots of gas while in 3rd gear. It still accelerated quite respectably, but it would be way better if it downshifted first. I assume its because the buggy is so light compared to the car, that the transmission controller thinks there isnt enough load to justify downshifting. Not sure what to do about it, and it may get worse after welding the transmission differential.
Another issue related to the transmission: cruising at about 30mph on flat roads in Drive found me riding the brakes to keep speed under control. It cruises quite fast in 4th gear with no throttle, so I had to downshift into 3rd to keep from going too fast. Welding the transmission differential will definitely fix this issue though
Jul 7, 2010 The 2 issues that I need to deal with first are the leaky, touchy brakes, and the bent front strut mounts. Bending the strut mounts back, and adding another support fixed the problem quite easily. The brakes are gonna be a bit tougher to fix.
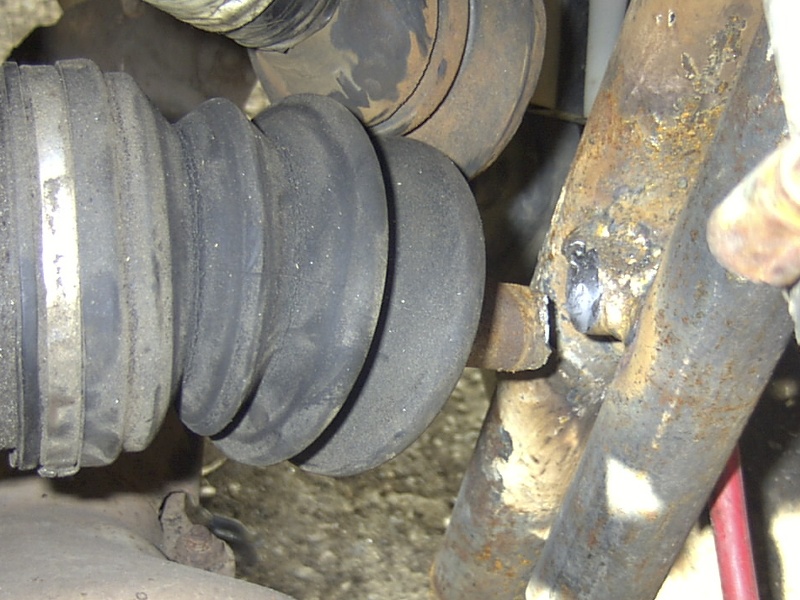
Since I gotta replace one of the back brake cylinders anyway, Im gonna convert the back brakes to disk while Im at it. I still have the front suspension from the tbird that I got the rear suspension from. Seems like a likely candidate to scavenge disk brake parts from!
The relatively minor issue of the buggy being too wide is easy to fix. Just gotta order new rims. The problem is that the there is very little availability for rims with the 5x4.25 bolt pattern that the tbird had. Rims with the 5x4.5 bolt pattern are very common with large backspacing, so Im gonna get some adapters and some rims with that pattern.
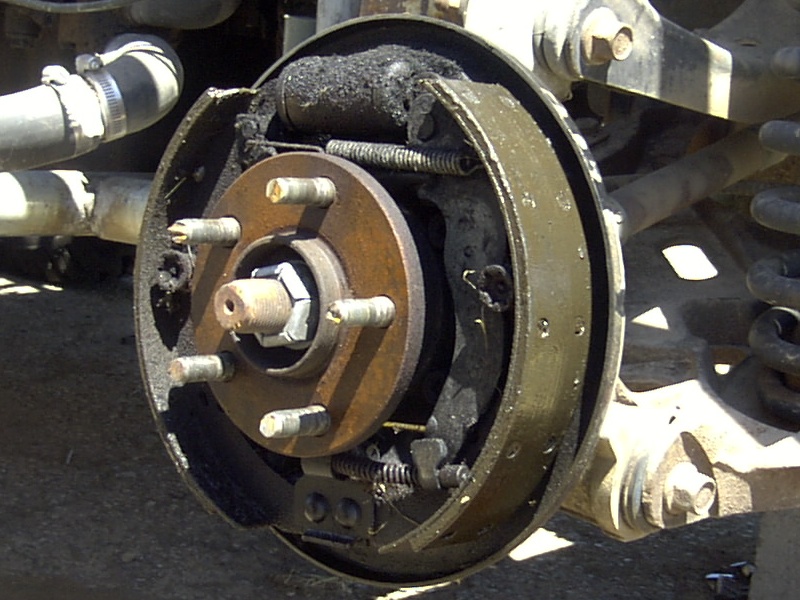
Jul 10, 2010 First thing to do to make the front brakes work on the rear is to strip all the drum brake parts off the hubs. The parts were all soaked with brake fluid from the leaking cylinder.
The hardest part to remove from the hub by far is the backing plate. The 4 beefy bolts that hold it to the hub are locktighted on and required hitting the wrench with a big hammer until the bolts were nearly half removed! Even then, it was very difficult to turn the bolts with just the wrench, but I finally got it.
Converting the front brakes to work on the back only involves making a bracket to hold the calipers in the right place, but since the bracket has to be so gnarly that it took several days to make the first part of the bracket that bolts to the hub.
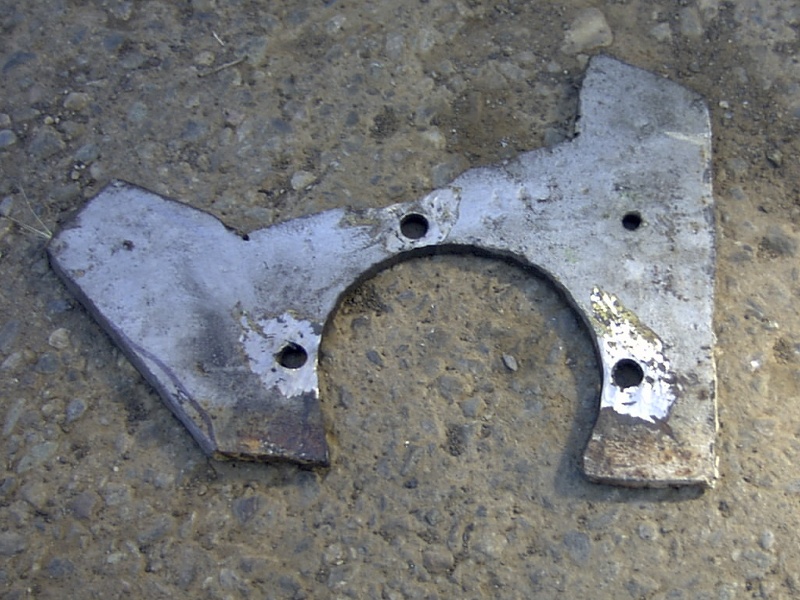 1/4 inch steel Bracket that bolts to the hub
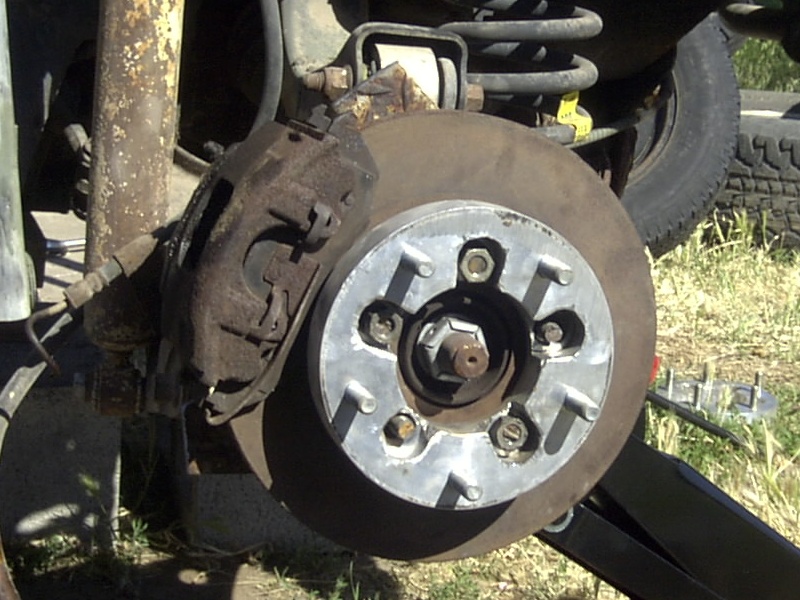 Caliper sitting on the bracket
I was thinking that there would only be 2 main pieces to the caliper bracket, but there isnt enough room under the caliper to make the caliper side of the braket a single piece, so its gotta be at least 3 pieces total.
 Caliper not really connected yet
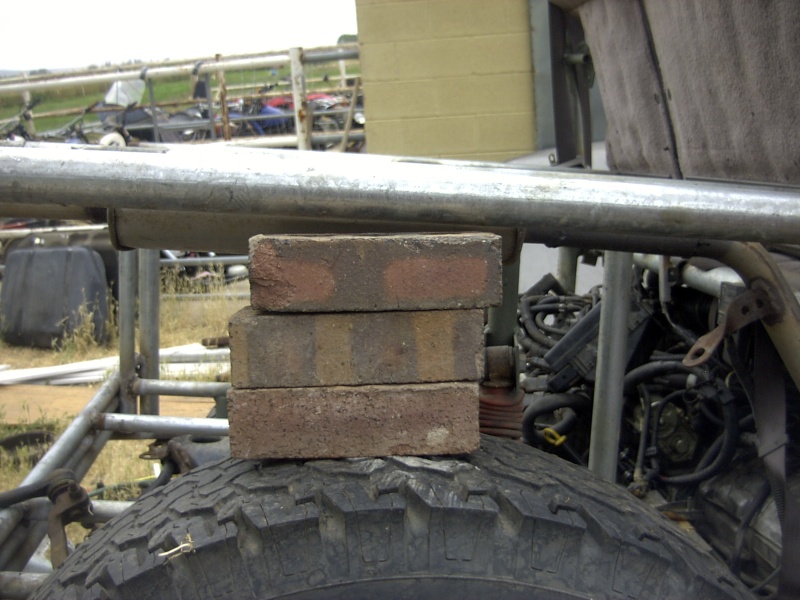
Jul 13, 2010 The back brakes have been the highest priority, and Im making good progress, but have also been working on getting the back tires from sticking out so much. The new rims got delivered several days ago, but the adapters just arrived today. The old rims were 15x9 with 3.75 inches backspace. The new rims are 15x10 with 6.5 inches backspace, so they are an inch wider and nearly 3 inches more backspace, so it should make each tire tuck in a bit over 3 inches more. Before, it was about 78 inches wide to the outsides of the tires, so now should be about 71 inches. Even though the back brakes still arent done, its time to see how it looks
The brakes are coming together nicely. The brake pad guides are done on one side, and just needs the caliper mounts to be complete. No pictures yet, but the first test of idling in gear with both back wheels off the ground seemed very promising!
Jul 15, 2010 Even with the tbird disk/drum master cylinder, the brakes work much much better. The front wheels still lock up quite easily, but anticipate that it will get even better after swapping the master cylinder and possibly putting the proportioning valve that was on the rear of the subaru inline with the buggys front brakes.
Instead of using the sliding bolt mounts to hold the caliper on, it was much simpler to make brackets to hold the caliper on from the top. This is a similar setup that my minivan has, except I simply welded the brackets on this one. Pretty stupid huh? Its gonna take a grinder and a welder to change the brake pads, but that will probably be a long time with such oversized brakes.
Well, the brakes work so good that holding the brakes and giving full throttle prevents the buggy from moving now. Only problem is that it was enough power to shear the front driveshaft! I guess that means its finally time to weld the transmission differential.
 Brakes are stronger than the driveshaft
Jul 16, 2010 Removing the transmission to weld the differential was pretty tough, with the tight space of the frame but it was even more difficult do because even after disassembling the transmission, I had to remove the differential from the transmission to get good enough access to weld it. Its gonna be even tougher to put back together since I will have to reset the ring and pinion clearance when reinstalling the differential.
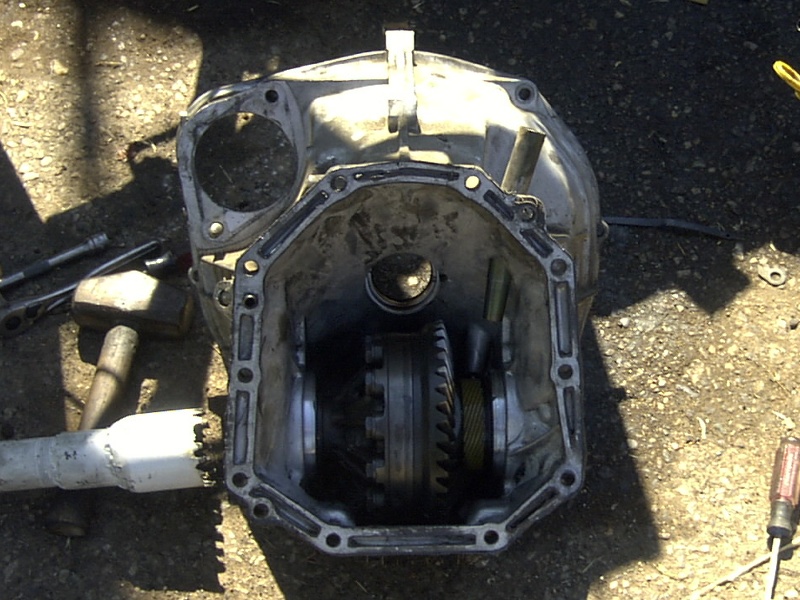 Still not enough room to weld diff
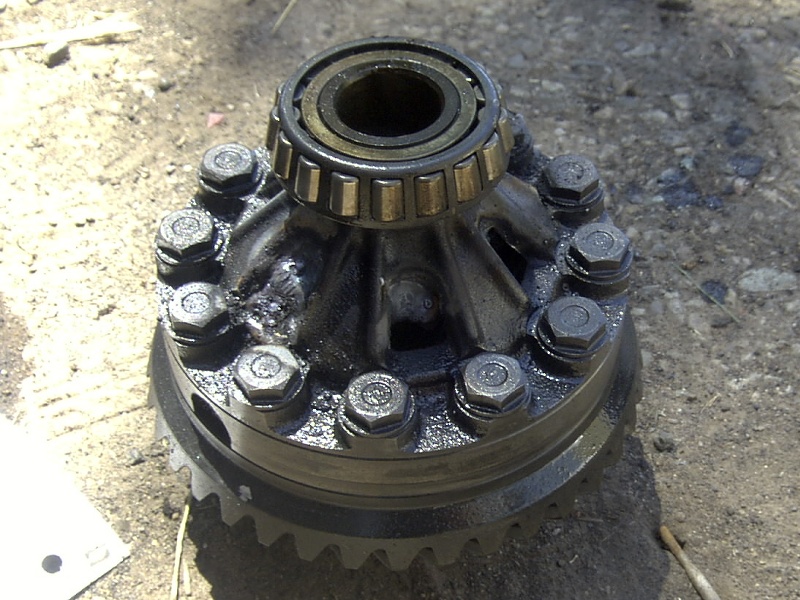 Differential removed and all welded up
Jul 19, 2010 I finally got around to reassembling and reinstalling the transmission. I forgot to top off the tranny fluid, so shifting was a little sporadic, but it works and is quite a bit faster. Too bad that twice as much torque sheared the rear driveshaft on the first lap!
 Rear driveshaft broke this time!
I have welded several front wheel driveshafts, and never had them shatter like this. The other ones have been on 1.5 and 1.6 liter motors, and this motor is a 2.2 liter, but it seems that the shafts on this motor are considerably smaller than the other ones. Smaller shafts combined with larger motor makes for less margin for strength.
Jul 21, 2010 I sent broken pieces of driveshaft and an unbroken subaru one to the driveshaft shop to see what they can do. They say its gonna be a couple days before they can come up with a plan. Looks like buggys gonna be parked for a bit.
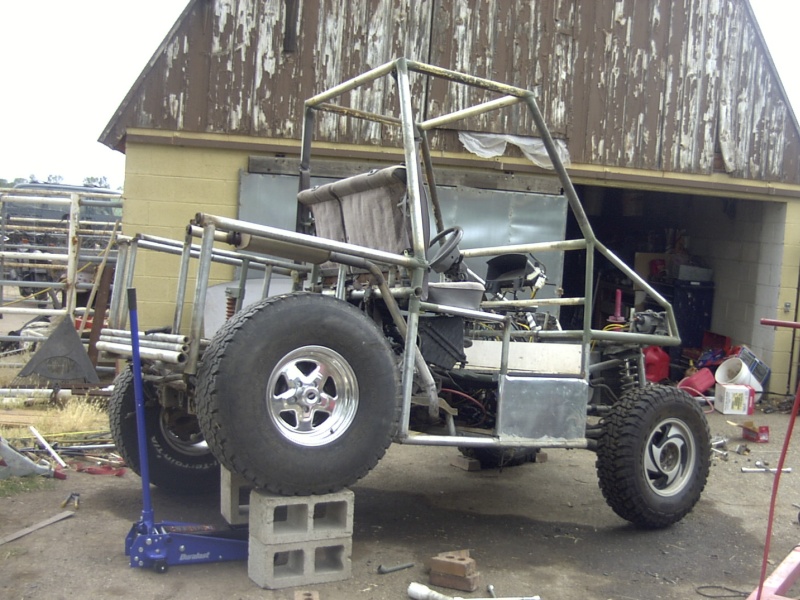
Even though buggy doesnt move on its own right now, I still have tons to do. Might be funny to check the suspension travel.
The rear end suspension can move over 2 feet when forced to without shocks. Its probably not heavy enough to bottom out the back suspension, even with most of the weight on a single back tire, but may be interesting to see what limits it has
 Buggy at rest, about 12 inches of clearance
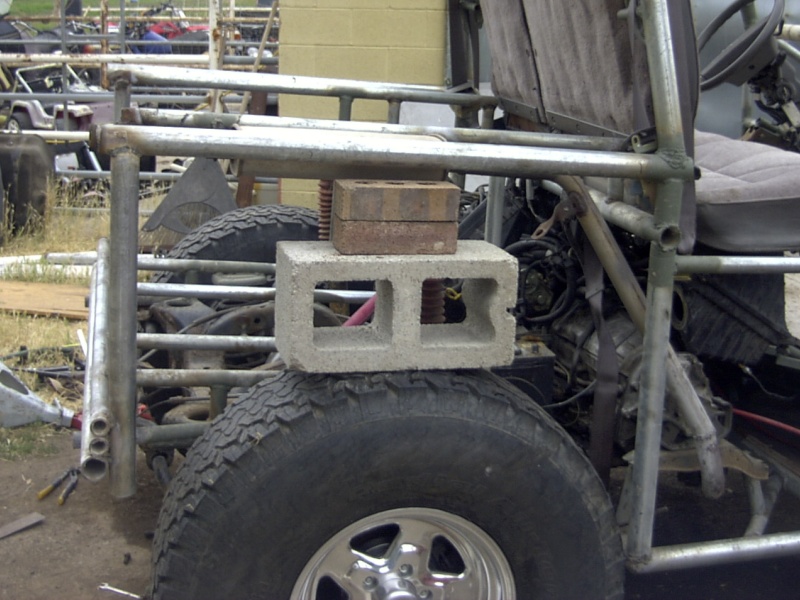
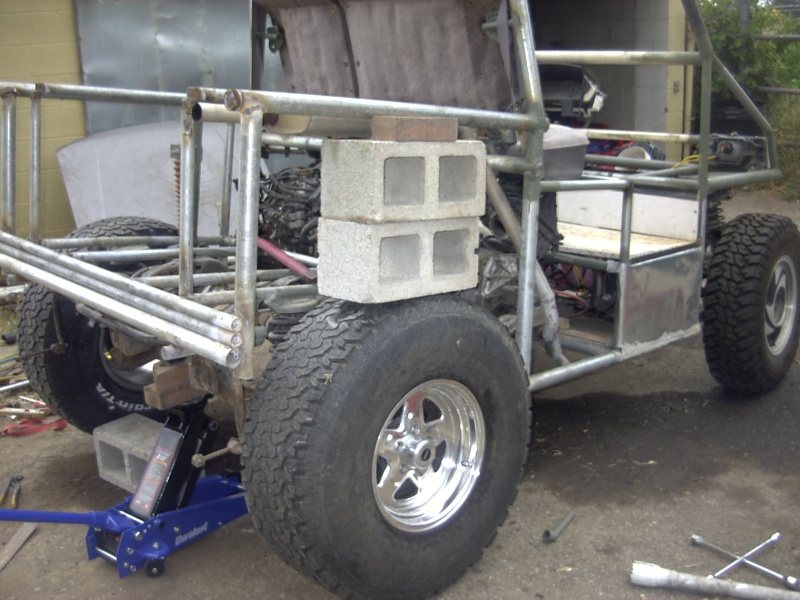
 Jacked up one wheel til front almost came off the ground!
 About 6 inches of clearance compressed
 About 18 inches of clearance with tire nearly off the ground
Dangit, I forgot to relocate the shock when I added taller springs. The shocks are severely limiting the droop. Adding a passenger to the buggy while single tire jacked up compressed the spring a couple more inches, but still only a total of 14 inches total. Relocating the shock mount should add a couple more inches of droop for 16 inches.
I guess its not too bad, but dissapointing since I had roughly 24 inches of travel before messing with the springs and before adding the shocks. Wasnt the joy fest I had hoped it would be.
Jul 26, 2010 With all the sadness of waiting for driveshaft parts, I almost forgot to mention that I got a new differential for the buggy!
When I first built the buggy, I was worried about the strength of the 7.5 differential, but after mutilating 2 driveshafts in less than a mile, I got even more worried. Figure it is time to replace the rear differential with a beefier one and use the little one for the front.
The main reason I didnt get a detroit locker for the 7.5 is that I figured it may end up going in the front someday, and a detroit locker in the front with hubs that dont unlock would be worse than when I welded the rear diff, and would pretty much prevent steering of any kind! The True Track on the other hand is supposed to be quite friendly in the front,since it is unlocked until needed. Kinda the opposite of the Detroit Locker. We will see.
Jul 28, 2010 Talked to the driveshaft place today, and they said its gonna be at least a couple more days before they can come up with a plan. Dangit!! I probably could have made something myself by now.
I was working on the bed before I busted the driveshafts, but doesnt make much sense to work on that until I get the driveshaft done, especially since I may have to stretch the frame a few inches in that area if the driveshaft shop cant come up with a good solution that will fit. I decided to work on the hood area for now, but gotta get the part above and between the headlights first, and it kinda depends on the shape of the bumper. Soooo, gotta make a bumper and radiator guard first.
I just happened to have a pretty gnarly chunk of steel that I could use for a bumper. Its ugly as something thats really ugly, but should be plenty tough and will make for a nice place to mount a winch later if I decide to.
I was worried about what the driveshaft place would come up with, so I had the wife take some rear wheel drive driveshaft parts to the shop to give them the idea of making a more conventional shaft with a double cardan CV joint to replace the front wheel drive CV joint. It will probably be longer than a shaft with the FWD CV jointed shaft, but will be much easier to replace when it wears out or if it breaks.
In the meantime, I decided to work on the front bumper and frame
 Bumper and part of front frame complete
See the 100hp lawnmower I built
See the other carts I have built
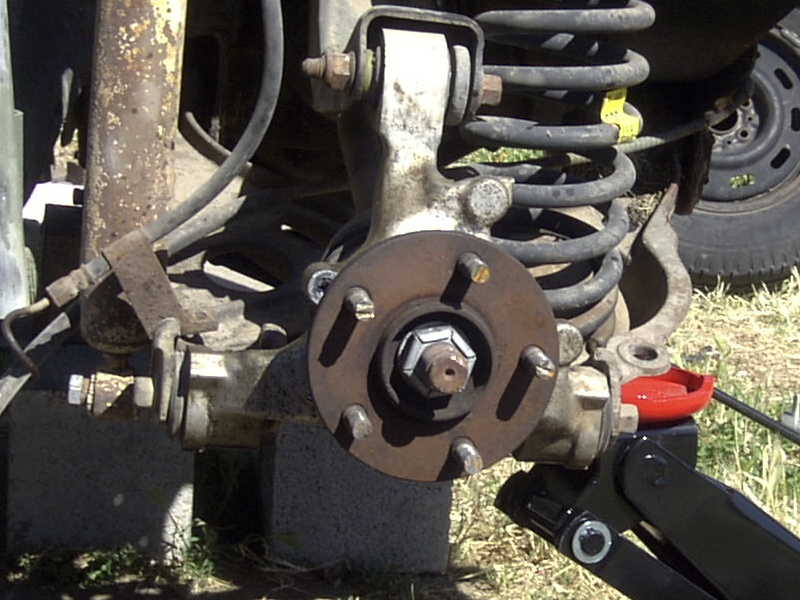 Stripped down to the hub
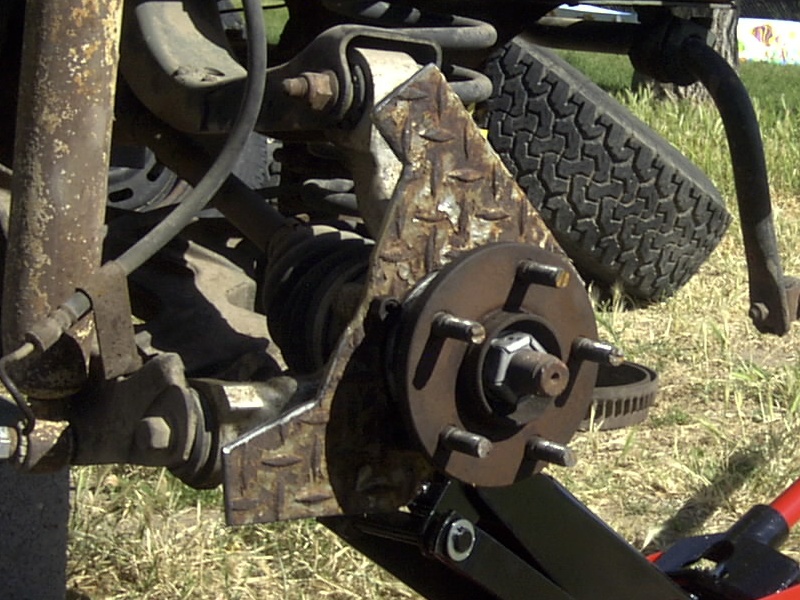 Bracket bolted to the hub
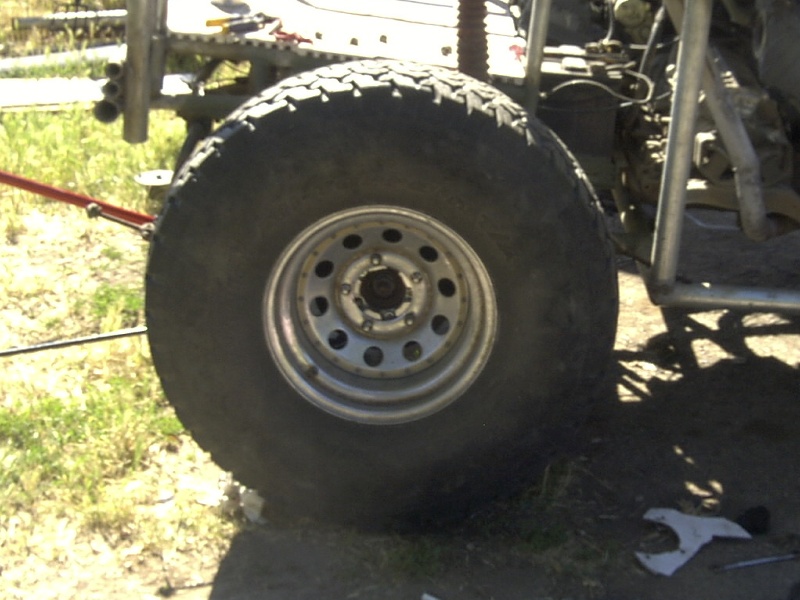 At least the wheel still fits
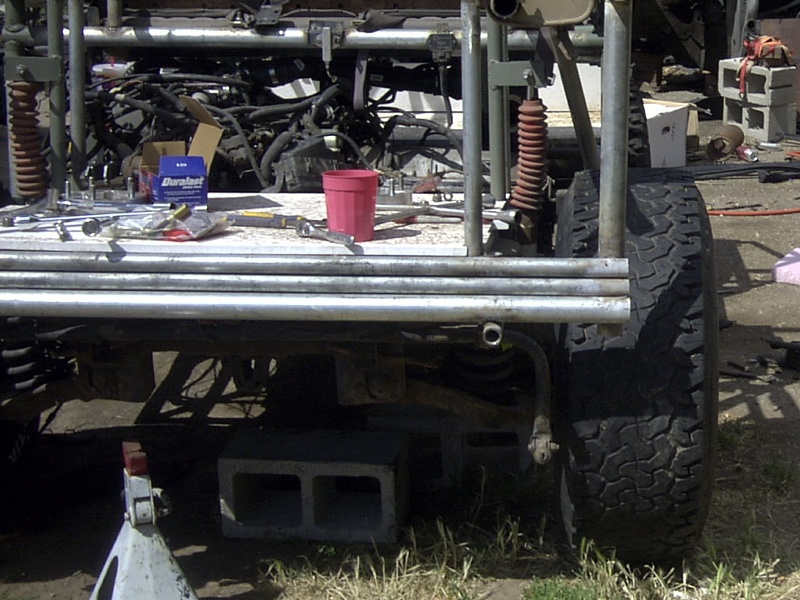 Tires tucked in alot better
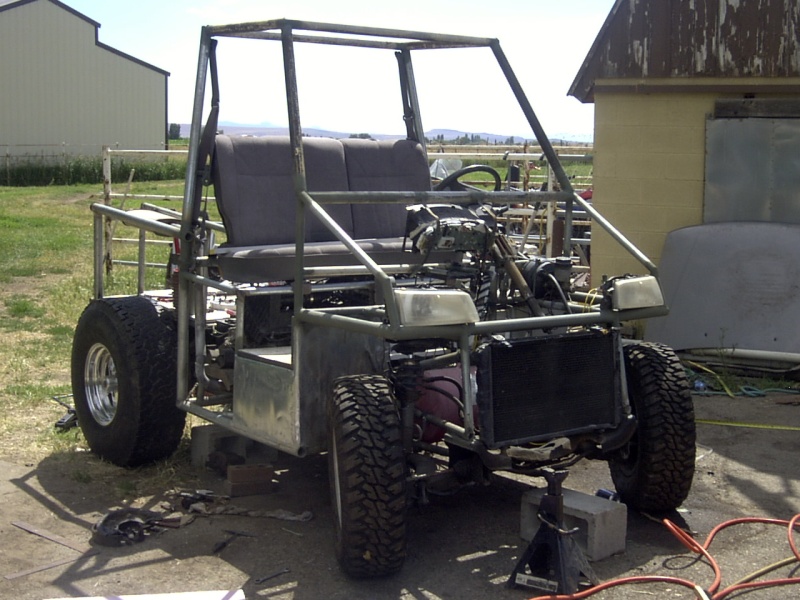 Looks alot better
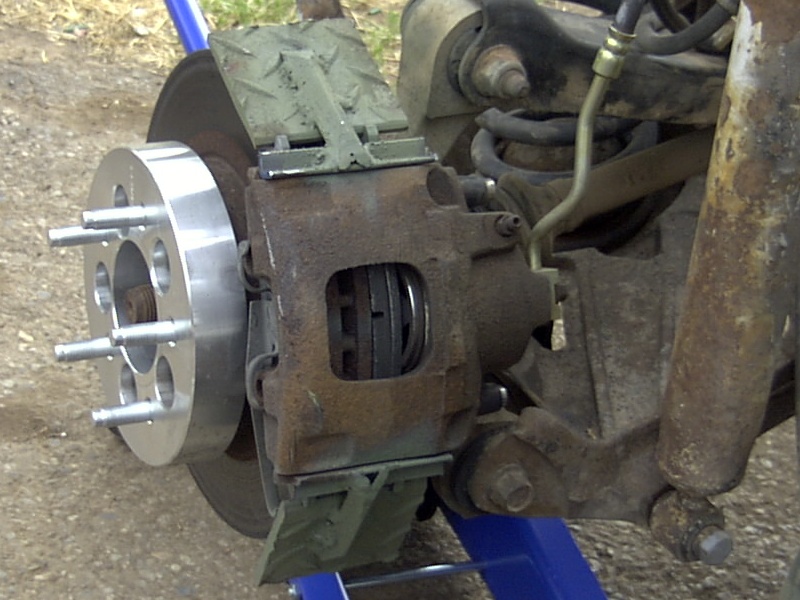 Brakes are done
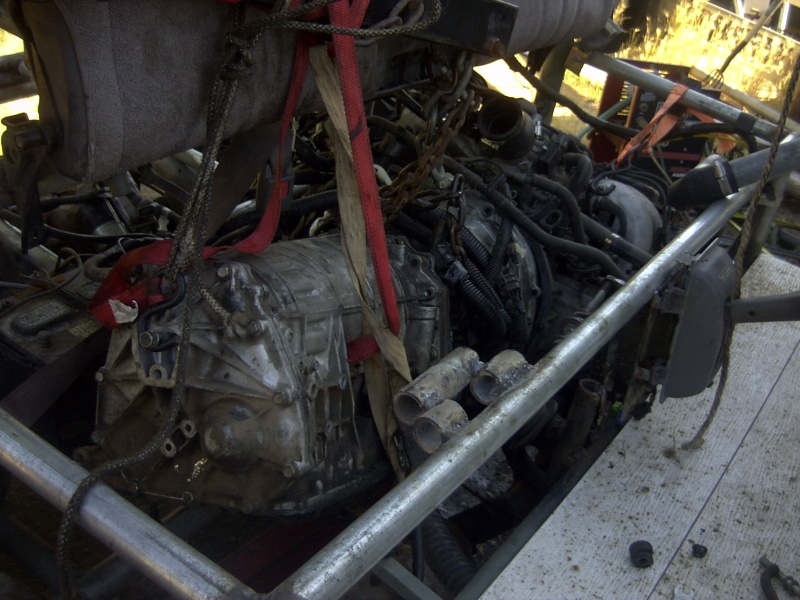 I hate this part
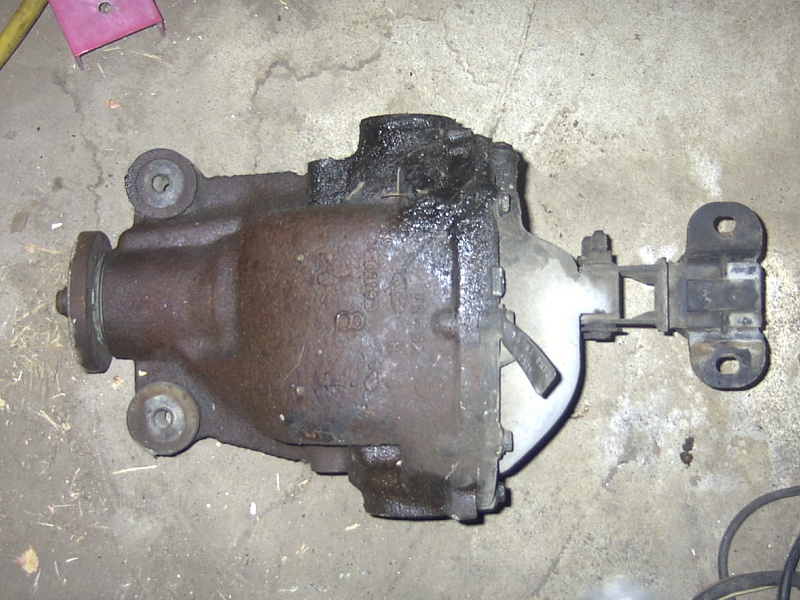 8.8 inch IRS differential!
Leave a Comment